Armor Making: Supply List
A list for the "standard" pepakura method
Well I hope you read the other page "Make your own Halo armor" since that DOES include some VERY useful links that you will need in order to fully get started. Before you continue reading this page, make sure that you already have your models prepared (downloaded) and make sure that you already have pepakura designer installed on your computer. From here on out, I will let you know what supplies you may need in order to complete your costume and how to go about by building your suit. There is A LOT of reading ahead of you so I hope you are well prepared to read and read! XD
Another thing I need to mention is that this stuff lists the info if you live in the UNITED STATES and possibly CANADA. If you live elsewhere, you may need to figure out the equivalent of the stuff where you live. I know the UK and other places have a different type of brand. The 405th is a helpful place to look for this info as members from other countries have come together to help each other out in looking for the required supplies. :)
SAFETY Supplies:
Because safety is HIGHLY important when working with this stuff!!!
Safety Goggles
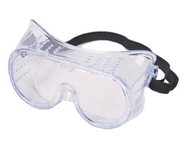
You WILL want to invest in a pair of these if you want to save your eyes for when you get older! XD The supplies that you will be using are pretty toxic and can harm you if you do not take the proper safety precautions. You want to buy the pair that fully touches your face. Even if you wear glasses, that is NOT enough. You want to make sure that any dust from sanding and when working with the fiberglass can NOT get into your eyes at all!
You could probably find these at an auto parts store or even at a hardware store like Lowe's or Home Depot. Not positive on the price since I already had a pair that my husband had, but these shouldn't be too expensive. Maybe around $10 or possibly less??
You could probably find these at an auto parts store or even at a hardware store like Lowe's or Home Depot. Not positive on the price since I already had a pair that my husband had, but these shouldn't be too expensive. Maybe around $10 or possibly less??
Laytex Gloves
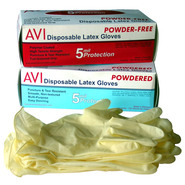
These are another VERY important piece of safety equipment. You do NOT want any of the stuff you are using to get on your skin as it can be skin irritant and when you mix some of the chemicals, they DO create a HOT reaction and you could possibly burn yourself. While the chemicals CAN eventually eat through the gloves, you will want to stock up on a box of disposable gloves. ANOTHER option you can try is to buy a pair of those rubber laytex gloves that people wear for household cleaning. That is what I did. I preferred these since they DO go more up your arm so they provide a little more protection. These also last for quite a few uses. Overtime, the chemicals will eat the rubber, but you will be able to get a lot of work done with just the one pair. You could find some at a dollar store and buy about 3 pairs and be good to go. :)
Respirator
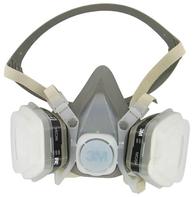
The NUMBER ONE, MOST important piece of safety equipment to have! This will save your lungs for future use. ;) You DO NOT want to be breathing in the harmful fumes that the supplies give off whenyou are using them and just because you are outside on a windy day and the wind may seem to be blowing it away from you, you can STILL inhale the fumes and if you plan on making this stuff once or multiple times, you will want one of these. DO NOT use the little paper ones as they are NOT regulated for the type of chemicals you are using. Just look at it this way, if you can smell the fumes, you are not wearing the right stuff. AFTER your stuff is FULLY cured (dried), you may still smell the stuff, but it is SAFE in it's cured form. The chemicals are at their most dangerous levels when you are mixing and applying everything. It's better to be safe than sorry, so be sure you have all the safety supplies you need! MAKE SURE that the filters you have connected to your respirator protect against OV fumes (organic vapors). These are the type of fumes that the chemicals give off so make sure your filters are suited for them. Over time, your filters WILL need to be replaced. Also, when your respirator is not in use, be sure to properly store it in the container you bought it in to preserve it's life. :P YOu can store it in a regular container, but the package it comes in works just as good. :)
You can find these at a Home Depot or Lowe's and may run you about $30 or more. The 3M brand that I bought was $29.99 at Home Depot and came with a set of filters, but I bought a seperate package of OV filters since I don't believe the respirator came with those types of filters. I think they did, but I can't remember. XD It's better to have an extra set of OV filters anyway. :P
You can find these at a Home Depot or Lowe's and may run you about $30 or more. The 3M brand that I bought was $29.99 at Home Depot and came with a set of filters, but I bought a seperate package of OV filters since I don't believe the respirator came with those types of filters. I think they did, but I can't remember. XD It's better to have an extra set of OV filters anyway. :P
Dust Mask
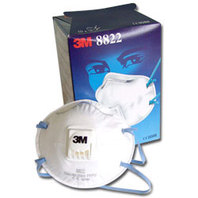
This is good to get if you wish to extend the life of your OV respirator. This particular type of mask is excellent for when you are sanding. Whatever you do, DO NOT use those cheap, paper dust masks. They do not properly seal around your face to keep the dust particles out. A higher end dust mask is MUCH more efficient to keep the dust out so that it doesn't settle into your lungs. Your body can not break the stuff down and it will collect in your body. That is why I can not stress enough how important it is to wear and use ALL the proper safety equipment when working with this stuff!!!!
Just because those paper ones are cheap, you shouldn't allow your health and safety to be a cheap issue. I've heard stories from those who suffered and it's NOT good. Some people have permanent damage and can no longer deal with ANY of this stuff. You are better off spending more money for better protection because a hospital bill is gonna be a whole lot more!!! D:
Just because those paper ones are cheap, you shouldn't allow your health and safety to be a cheap issue. I've heard stories from those who suffered and it's NOT good. Some people have permanent damage and can no longer deal with ANY of this stuff. You are better off spending more money for better protection because a hospital bill is gonna be a whole lot more!!! D:
Building Supplies:
Cardstock
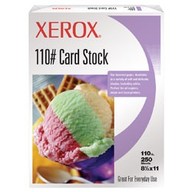
Well, what else did you think you were gonna use? :P It is very important to note that you CAN NOT use standard printing paper. That stuff is TOO thin and is prone to warping when using the chemicals. It's too thin to hold up to the weight so don't waste your time with it. You will want to get cardstock and needs to be AT LEAST 110lbs. Most printers are able to handle this thickness of paper. This is what you will want to use when you print all your paper templates out. It doesn't matter what brand you go with, just make sure it says CARDSTOCK and says 110lbs on it somewhere!
I found a good ream of cardstock at Wal*Mart for around $6. As long as you arranged your pieces right in pepakura to make it so that you can fit as many pieces possible on one page, one ream should get you pretty far. You should even have enough to print EVERYTHING as long as you scaled everything correctly and don't have to keep reprinting! XD Where ever printers and paper are sold, you should be able to find the cardstock somewhere close by. :)
I found a good ream of cardstock at Wal*Mart for around $6. As long as you arranged your pieces right in pepakura to make it so that you can fit as many pieces possible on one page, one ream should get you pretty far. You should even have enough to print EVERYTHING as long as you scaled everything correctly and don't have to keep reprinting! XD Where ever printers and paper are sold, you should be able to find the cardstock somewhere close by. :)
Bondo Body Filler
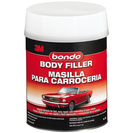
This will be the FINAL stuff you use BEFORE you start your final paint job. You CAN go without it, but if you do, you will see the "blocky-ness" of the paper folding and your suit WILL NOT have the smooth, rounded finish. I have seen people NOT use this and the finished product does not look very nice. UNLESS your files were what people refer to as "smooth unfold" you may get away more easily without having to use this since a "smooth unfold" removes a lot of the fold lines that appear on the paper stuff you print out. MOST files are NOT the smooth unfold. If they are a smooth unfold, it will state it in the title or somewhere in the file.
You can find this at an auto parts store and some major shopping stores in their automotvie department. The large cans can run anywhere from $20 up to $30.
You can find this at an auto parts store and some major shopping stores in their automotvie department. The large cans can run anywhere from $20 up to $30.
Fiberglass Resin
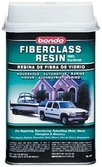
This is a MUST and it's not really something you can avoid since this is needed to help reinforce your finished paper armor. Once you fully complete a piece, you will then apply 2-3 LIGHT layers of this on the OUTSIDE of your piece and allow it to dry. You will notice that it feels a little more rigid and your piece is now a little easier to work with. When applying it, be sure to avoid having too many drips as much as possible because when it dries, you will have little "resin bumps" all over your piece. You CAN attempt to sand these down, but use coarse grit sandpaper as this stuff is not too sandable then finish it off with fine grit sandpaper to try and smooth it a little more. DO NOT sand the whole piece. You just want to sand away any bad bumps you might have. :)
A can of this can run anywhere between $15-$20 and can also be bought at an auto parts store as well as in the automotive department at a major shopping store. You may also end up buying a few of these cans. XD
A can of this can run anywhere between $15-$20 and can also be bought at an auto parts store as well as in the automotive department at a major shopping store. You may also end up buying a few of these cans. XD
Fiberglass Cloth
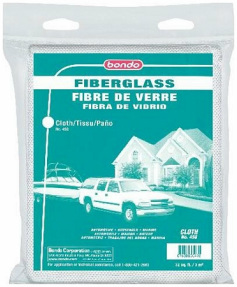
This is the first form of fiberglass. You WILL need this to actually HARDEN your pieces after you have applied the resin to the outside of your paper piece. Fiberglass cloth will appear as a woven sheet and is not very "stringy". Other prop builders have said that cloth is not the best one to use as it doesn't seem to be as strong. However, the cloth is normally more "clean" to work with and doesn't cause as much of a mess. You WILL need to cut smaller pieces when using it to place on the INSIDE of your pieces. You DO NOT want to fiberlgass the outside of your pieces as it will cause you to loose detail AND you may find yourself having to do some hella sanding! XD So be sure that your fiberglass goes on the INSIDE of your armor. :)
I have personally never bought this myself, but I imagine that a pack of this shouldn't be more than $10 and can be found in the same places as the above materials. You may go through about 3-4 packs of fiberglass.
I have personally never bought this myself, but I imagine that a pack of this shouldn't be more than $10 and can be found in the same places as the above materials. You may go through about 3-4 packs of fiberglass.
Fiberglass Mat
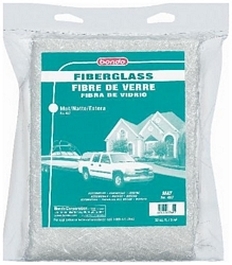
Now THIS is the fiberglass that I have seen MOST prop builders use as well as myself. The good side: It's apparently the more stronger fiberglass to use. The bad side: It is the more "stringy" stuff so it gets a bit messy when cutting it. As I stated before, this will go on the INSIDE of your armor pieces and you will need to cut smaller pieces so you can more easily place them. You CAN get away with doing only ONE layer of this fiberglass, but I have heard of a few people that did 2 layers for extra strength. Personally, I've always did ONE layer of fiberglass and my stuff seemed to work out just fine. :)
A pack of this runs about $7 or so. You may need a few of these packs as well or MORE than the normal amount if you feel you want to do more than one layer. Just make sure that your first layer is fully dried BEFORE applying a 2nd layer. Again, you can find this in the same places as mentioned above.
A pack of this runs about $7 or so. You may need a few of these packs as well or MORE than the normal amount if you feel you want to do more than one layer. Just make sure that your first layer is fully dried BEFORE applying a 2nd layer. Again, you can find this in the same places as mentioned above.
Spot Putty
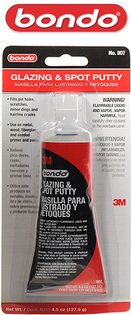
This is something useful to have if you are doing the Bondo body filler work. This will help to cover any fine lines or small pin holes that may have appeared AFTER you have sanded your piece. The BEST way to look for these imperfections is to spray a coat of GREY PRIMER over the piece. Doing so will help make those areas stand out even more and you can then use a little bit of spot putty and you will use it in the same fashion that you applied the body filler. You CAN NOT use A LOT of this on a LARGE AREA. Spot putty is used for just that..........spots. ONE tube is all you will really need for, quite possibly, your entire suit!
At the same time, you can opt out on this and use those small scratches and spots to work FOR you and NOT AGAINST you as they can be good for that battle damaged look. :) I have actually seen some people carve into their finished sanding work to create some dramatic battle damage, and if painted just right, it can look really cool! :D
You can find this stuff in the same area as the body filler and fiberglass resin and should not cost you more than $10. :)
Primer
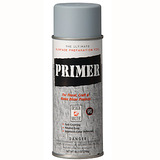
Remember that primer I previously mentioned? Well, this is sort of what it looks like. The name brand will vary, but no matter what brand you go with, it WILL say PRIMER somewhere on the can. Grey tends to be the best color to go with since it is a neutral color and should not affect your final color that you decide to go with. :)
This can be found at an automotive store, hardware store and any store that carries a variety of spray paint. You might get lucky and even find it at the dollar store, saving you some $$$! Normally, a can of primer should only run you about $7, but the name brand varies. If you can find a cheaper price, then go for that.
This can be found at an automotive store, hardware store and any store that carries a variety of spray paint. You might get lucky and even find it at the dollar store, saving you some $$$! Normally, a can of primer should only run you about $7, but the name brand varies. If you can find a cheaper price, then go for that.
Sandpaper
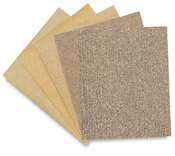
If you decide to use the Bondo body filler on your stuff, you WILL be needing to sand it down as well as sand away any "resin bumps" that have appeared on your armor during the hardening process. Sandpaper comes in a variety of grits and can be very fine (better for finishing to smooth out) and coarse (the kind you start off with). You probably do not want to get something that is TOO coarse because it can cause lines to appear on your pieces when sanding. Try to find the most appropriate sandpaper for the job. You can find sandpaper at nearly any hardware store like Lowe's and Home Depot. You really shouldn't spend more than $10 for your sandpaper.
Paint Brushes
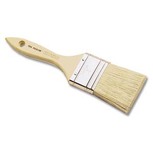
Now I'm sure you know what paint brushes are. :P You may want to try and find some at a dollar store since you may find yourself going through many of these since you will be needing them to apply your resin and fiberglass and once the stuff dries on the brush, the brush is no good and you will need to throw it out. You CAN use paint thinner so that you can continue to reuse them, but you could just spend about $5-$7 for paintbrushes at the dollar store. The ones I found were a pack of 4 and had various sizes which were good for doing some of the smaller pieces like the handplates then you can use the larger ones for the larger pieces.
Dremel/rotary tool
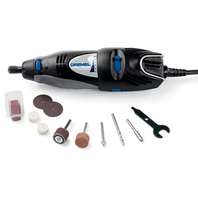
You may find yourself REALLY wanting one of these. This will help to trim off the excess fiberglass after "glassing" your armor and it will also help to trim up your visor for your helmet since the visors are sometimes bigger than the area you need to place it in. These are also VERY handy in creating small groove lines in your armor after apply the Bondo Body filler and sanded it. There are a lot of different pieces that you can get that can really help make your armor "stand out" and have a very nice look. Even if you don't decide to do any finishing lines, you may still want one to help with trimming the visor and the fiberglass AFTER it has dried! XD
A dremel can normally run around $30-$50 or even more depending on what type of set you get. You can find these at a hardware store and possibly an automotive store. As long as it's a rotary tool and not the "DREMEL" name brand, it will get the job done. :)
A dremel can normally run around $30-$50 or even more depending on what type of set you get. You can find these at a hardware store and possibly an automotive store. As long as it's a rotary tool and not the "DREMEL" name brand, it will get the job done. :)
Among Other Things...
Other supplies that you will need to have on hand would be scissors, a ruler (preferrably a metal ruler), and an X-acto blade. These tools will help when cutting out your cardstock pieces and the scissors will really help when cutting the fiberglass as well. These should be common sense because how else are you supposed to cut everything out? XD
Finishing Touches
This section will pretty much go over the supplies and stuff that you may need or want to fully finish your suit. :)
Spray Paint

You're gonna need it if you want to paint your armor! XD You can buy this stuff at any hardware store and in some cases, even the dollar store! I've managed to pick up some spray paint from the dollar store, however, I bought the clear coat only and made sure to buy a good reputable brand at another store. Depending on the brand you go with, you may spend anywhere from $3-$10 PER CAN of spray paint. I will tell ya right now that you do NOT need some fancy spray paint. You can get away with spending $3 or $4 per can and still end up with a good finish, granted to didn't spray too heavy and ended up with a runny looking paint job! XD
Krylon seems to be a common brand that I have seen other people buy to use for their suits. :)
Krylon seems to be a common brand that I have seen other people buy to use for their suits. :)
Clear Coat
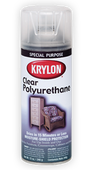
Here is that clear coat I was telling you about. XD When you go to pick up your can of clear coat, you will notice that they come in a variety of finishes: gloss, matte, or satin. Since I don't think you want shiny armor, I would stay away from the gloss. Any type of gloss is going to make your armor look shiny and since when did Master Chief walk around in shiny armor? LOL You just want to help protect your paint from chipping. If you feel that the paint you have already sprayed is good enough to hold up against chipping and you don't want to risk your armor looking clean and shiny, then you can opt out of buying the clear coat, but a layer is still good to have. :) A maximum of 2 cans should work to spray ALL of your armor pieces. As I stated before, I bought my clear coat from the dollar store and it worked just fine for me. :) You shouldn't spend more than $8 per can depending on the brand you buy.
Straps and buckles
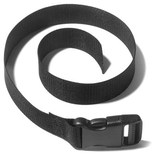
If you want to keep that armor in place, you will want to buy some of this stuff. There is really no right or wrong way in creating your strap system. Just do it however YOU will think it will work for YOU. Buckles come in a variety of sizes so you might want to use wider buckles for your chestplate and the smaller buckles for the smaller pieces. You may discover that you will be using more smaller buckles than the larger ones since you also want to be to try and hide them as best as possible, but make it so that you are still able to buckle everything and are able to put it on and take it off. The MOST COMMON areas that I see people using the buckles and straps for is to hold together the chestplate, hold up the thigh pieces and for the belt (cod piece), and bicep pieces. If you want, you can also create a strapping system for the shin pieces to keep them from spinning around on your leg, unless you have some soft foam to line the inside of the shin pieces with so that they maintain a nice, snug fit. :)
I have managed to find these at Wal*mart and the prices are not bad. I was able to get all the buckles I needed and only spent around $7. :) This stuff could also probably be found at a craft store or if you don't mind Ebay, you can find stuff there. Might even get some for a good price! :)
I have managed to find these at Wal*mart and the prices are not bad. I was able to get all the buckles I needed and only spent around $7. :) This stuff could also probably be found at a craft store or if you don't mind Ebay, you can find stuff there. Might even get some for a good price! :)
Gloves
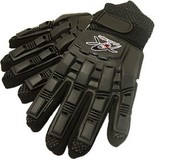
You will be needing some sort of gloves to wear to complete your suit. You don't want to be bare handed with your handplates on now, would you? Probably wouldn't look right. XD These particular type of gloves seem to be a popular choice among those that build Halo suits due to their style. The ones you see pictured are gloves normally used for paintball. You could probably find a pair where ever paintball products are sold or even online somewhere. These might be a little pricey, so you can always try to find a plain, black pair of gloves if you are looking to stay on the cheaper side. :P
Visor
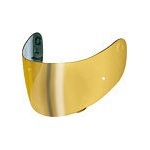
You will obviously want a visor for your helmet! XD The most popular brand I have seen among Halo costumers is the HJC brand. The visors CAN get pretty costly. You can always try looking on Ebay for a decent, cheap visor and you can even search around on amazon.com for a visor as well. If you want it so that people can NOT see your face, make sure you get a MIRRORED visor. You can even try to go to a motorcycle shop that sells helmets because most likely, they should sell replacement visors. This way you can also see for yourself if the visor has the effect you want. :) MOST visors will require that you trim them up a bit so they can fit better inside your helmet. There are some cases where you will have to force the visor in place. You can screw it into your helmet or try to use another VERY STRONG adhesive to glue it in place.
Other helpful items...
Masking tape is a good thing to have when you are painting in case you want to have more than one color on a piece of your armor AND also helps to achieve clean, straight lines. :) You will also want to have some newspaper so that you can use half of the masking tape to place over the edge of the newspaper and then tape it onto your armor piece that you are painting. You just want to at least make sure that you don't get paint on an area that you don't want to be painted. :P
The "odd" stuff
There are some strange things you can use to really add to the battle damage look. BEFORE you spray your final color on your armor, you can spray it with CHROME spray paint. This is useful for that "metal" look. Then you can use products such as, but not limited to: toothpaste, mustard, vaseline, etc., and then "paint" this stuff onto various parts of your chromed piece where you wish to have some battle damage. Be creative in how you apply it. There is no right or wrong way on how you put it on. :) But try not to over do it as it might look too messy. XD After you have done one piece like this, THEN you can go ahead and spray your chosen paint color over top of everything. Allow the paint to dry and using a damp rag, wipe away the areas you created and the chrome paint should show through! :D
In order to then help add to this effect, you can buy a bottle of BLACK ACRYLIC PAINT (can be found at craft stores for around $2) and squirt some of the paint onto a scrap piece of paper, cardboard, or whatever you prefer, and using a rag (make sure the rag doesn't leave behind "fuzzies") and dab the rag into the paint and go over the chrome areas and around other various parts of the armor piece. This is what a lot of people refer to as "black-washing" and helps give that worn, dirty, battle damaged look! :) Sometimes having the rag be damp will help to rub it on better and smear it in a little more.
Another neat effect I have used, (I have actually done this on my Kat costume) is "splashing" the black acrylic onto my armor. It really gives that "I've been to hell and back" look to your armor if you want to go that route. :P You can do it light or heavy depending on the look you want to go for. In order to achieve this look, you will want a wide paint brush that has long bristles. You will then want to dip the brush into the black acrylic paint, (not TOO much if you want less of a splatter look, use more for REALLY splattered) then wet the paint brush (might be good to have a plastic cup for this), set your piece on the ground (be sure to do this outside folks! lol) and then as if you are smacking someone with your paintbrush, "smack" it towards your piece. DO NOT actually hit the piece! You want to be back from the piece. The watered down paint will then splatter onto your armor. :) Knowing how to do this can always give a unique look to your armor. ;)
Want to make it look like you just slaughtered a bunch of covies? You can use a purple or blue acrylic paint that matches the covie blood and using the same technique as above, splatter your armor to make it look like you were in one helluva battle! XD
REMEMBER: This is YOUR armor and there is NO right or wrong way in how you add your final touches. Make it unique. Make it your own!! :D
