Make Halo Armor!
The FOAM method
The foam method was "newly adopted" by the 405th back around 2010. There was another site that was already using foam for their builds, I THINK it was the RPF (replica prop forum). Anyway, making your armor with foam can be a little quicker than the "standard" method because you do NOT need to take the time to harden your armor as the foam is already stiff enough to hold shape. However, if you are using the pepakura files as templates, you WILL need to alter the file to make it more suitable for foam. THAT can be the tricky part. You will need to know what pieces to keep and what pieces you DO NOT need since the foam is thick and it can work in your favor, but I will go into that later. THe BEST part about building your costume out of foam.......you can do it ALL YEAR 'ROUND which is great for those who experience cold weather and don't have the proper working conditions for a pepakura build. :)
SUPPLIES FOR FOAM BUILDING
Keep in mind that the stuff contained in this list are for those that reside in the U.S and parts of Canada.
The MAIN thing is the foam, of course. :P A lot of people get their foam from a hardware store called Harbor Freight (might not be in canada), and runs about $12-$15. The foam comes in a pack of 4. The squares measure roughly 24 inches by 24 inches and look like giant puzzle pieces. The foam is smooth on one side and has a texture on the other side. In most cases, the smooth side is the side that you will be painting on so you will want it on the outside, however, the textured side is good to use for small areas on armor where you may wish to have a textured effect. It's a nice little tip to know. ;)
Usually around 4-5 packages should be all you need to complete Halo armor. :)
I know that in Canada, I have seen pictures of foam where the textured side looks like diamond plating.
Usually around 4-5 packages should be all you need to complete Halo armor. :)
I know that in Canada, I have seen pictures of foam where the textured side looks like diamond plating.
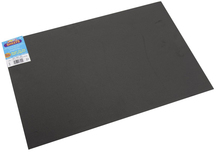
Then there is this foam, but it is NOT recommended to be used to build with since it's so thin. This stuff is normally around 2mm thick and is excellent for detail work. It comes in handy to save you from having to cut out a small, inner shape of the thick foam, only to raise it up the cut out piece a little bit. The craft foam or "foamies", as some people call it, helps with those detail pieces. It can be found at a craft store and can vary is size. I have seen it come in a standard 8 1/2" by 11" sheet and sometimes a little bigger than that. If you find the larger sheets, go with that one. I believe either size is about the same price so it's best to just get the bigger one.
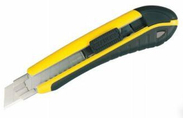
Retractable cutting knife is more commonly used to cut the thick foam. These typically feature the "break away blade" so that when the tip and edge start to get dull, you can break off what is no good and then have a sharp blade again. Replacement blades don't cost a whole lot so you are able to get quite a bit for cheap.
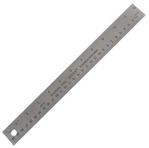
A metal ruler would be the best ruler you want to use when cutting because the blade won't cut into it. This may or may NOT be required for you if you feel you have a good, steady hand to cut the straight lines in the foam, but at the same time, since the foam is thick it seems to help keep the blade straight and reduces the amount of mistakes you make. Foam is normally a little more forgiving though if you make a small mistake while cutting and it won't be so noticeable in the finished piece, but a metal ruler is still good to have on hand, just in case. :P

Just like the "standard" pepakura method, you STILL need card stock because you will still need to print out your templates from pepakura to be used as templates and the card stock makes for a good, sturdy template so you can trace the designs onto the foam. You can find this at an office supplies store or any large retail store that sells computers, because most likely, they will also sell paper. :P
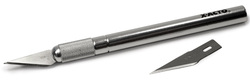
While an exacto blade may NOT be the best to cut out your large pieces of foam like a reatractable blade, these DO come in handy. Since the blade can and does get dull, it will be a good idea to pick up a pack of replacement blades. I have found that these come in handy for a few uses while doing my foam builds and you will learn more about that later. :)
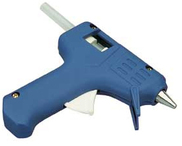
Probably the best glue to use when gluing all your foam pieces together. Some people have used contact cement, but I am unsure of the price for that, but I know that you can get a high temp glue gun and glue sticks pretty cheap. Keep I mind that there are TWO different types of glue guns, there is one for the fatter looking glue sticks and one for the mini glue sticks. Personally I would stick with the mini glue sticks because working with something smaller might make your job a little easier on you.
So those are the BASIC tools required to start a foam build. As you can see, most of the stuff is pretty cheap and you would be surprised how much of your armor you can build with just ONE package of foam! :D
ADDITIONAL SUPPLIES
The first item I am going to bring up is a black sharpie or even a pen (black or blue will work), and you can use that to trace the template onto the foam. However, I would personally prefer the use of a pen because it creates a MUCH thinner line and makes it easier to follow the line when cutting out the foam.
PAINT
Something you will need, of course, is your paint. For that, you have a few choices. You can use spray paint, acrylic, or if you have the know how, you can use airbrush. Naturally if you choose to go with spray paint, you will need to do that outdoors or in a garage if you have one. :P
If you're like me and live where it gets TOO cold to use spray paint, you can use normal acrylic paint. When painting a large area one color, you will want to have a wide paint brush which will allow you to cover large areas easier and faster. If you want certain, smaller details to be a different color, you can easily just use a smaller paint brush and hand paint it. This is something you can't always do with a spray can because you would need to first tape off the surrounding area so you don't get any over spray where you don't want it. This is one of the benefits of painting by hand.
The final option is the airbrush. Now I am an airbrush artist and have been doing it for MANY years. I took private classes for it and when I first saw it, airbrushing looked easy. It wasn't. You have learn the balance of air/paint ratio because you don't want TOO much paint coming out to where it puddles and ultimately can ruin a piece. You also need an air compressor that puts out AT LEAST 95 psi. They can be slightly loud and when using indoors, it might annoy some people. >_< lol Also, airbrush paint is NOT always cheap. I have heard people say "Oh, you can just use acrylic paint and water it down." And in my opinion, NO, you can't. Acrylic paint is not made to be run through and airbrush and if you don't clean it enough by running water through it with the air, the paint can clog up the airbrush and will have to stop what you are doing, take it all apart and clean it out. So, if you have experience with an airbrush, you can go ahead and use that, otherwise, I wouldn't spend the money, unless you believe you can teach yourself. :P
ELECTRONICS
If you choose to, you can add lights to your foam armor. I have seen people use just a standard 9v battery and connect it to small, LED's that they installed into their foam armor. If you don't know electrical work, you can teach yourself how as you should be able to find videos on youtube that can show you. If you already know how to do that sort of thing, then it's up to you to figure out how you want to install your lights and make a spot for the battery. This is what makes the use of foam handy, since it's so thick, you can cut out and area to put your battery and be able to hold it in place. You can watch the video below and see how Tim has installed batteries for a custom build that he made for someone. It may help you out. :)
If you choose to, you can add lights to your foam armor. I have seen people use just a standard 9v battery and connect it to small, LED's that they installed into their foam armor. If you don't know electrical work, you can teach yourself how as you should be able to find videos on youtube that can show you. If you already know how to do that sort of thing, then it's up to you to figure out how you want to install your lights and make a spot for the battery. This is what makes the use of foam handy, since it's so thick, you can cut out and area to put your battery and be able to hold it in place. You can watch the video below and see how Tim has installed batteries for a custom build that he made for someone. It may help you out. :)
A heat gun or a hair dryer that can get VERY hot. You might be wondering what this is used for. Well, this is what people use in order to help curve the foam and get it to hold the shape better. I used a hair dryer for my build since it DOES get really hot, however, since it doesn't get nearly as hot as a heat gun, I had to hold it in one spot for quite some time to really heat up the foam and then start to shape it the way I needed it. You may have to hold it in place for a bit to allow the foam to cool and hold the shape better.
Another item that I have used ONCE was plasti-dip. I did NOT use it when I made my Kat costume, but I tried it on the Halo 3 MK VI thigh piece that I had built out of foam and after I sprayed it all over the piece, I noticed that in some areas (the glue seams), the plasti-dip seemed to eat away some of my glue, causing the glued pieces to come apart. I personally will NEVER use it again, but use it at your own discretion. I have not heard many cases of this happening as people still continue to use it.
The final item you may or may not need, is clear coat. This is what will help keep your paint in place since the foam can bend, it might cause your paint to chip off. You can reduce this from happening by giving it a couple light coats of clear coat. When I did my Kat build, I ended up NOT using clear coat and actually used the "paint cracking" to my advantage. It helped to create a more "battle damaged" look and it didn't look too bad at all. I was quite pleased with it. :P However, it IS possible to get away WITHOUT using clear coat, so it's up to you if you want to use it or not.
TIPS AND STUFF
In this section I will just cover some of my own personal tips and ideas as well as some that I may have seen from others. This section may be pretty useful and there may be something that can help you out, give you an idea, or you might even come up with something entirely different on your own and create your own unique ideas! :D
EXACTO BLADE TIP: Besides just cutting foam, you CAN use it to trace your template patterns onto your foam. This is a GREAT way to avoid having any other marks on your foam. When I used to use a pen, I noticed that I would end up with some ink on my hands from handling the foam. That is when I decided to use my exacto blade. However, when you do it, you do NOT need to press too hard. Just use enough pressure to make a visible line and take your time when doing this so you don't cut into the template.
BATTLE DAMAGE TIP #1: If you want your armor to have the appearance of mud or something else splattered on your armor, there is a easy and sort of fun way to achieve this look. I used this technique on my Kat costume. First, start out with a wide paint brush, probably around 1/2 inch wide and get it wet. It may be helpful to have a plastic cup with some water in it as you will be needing more water. Once your brush is nice and wet, dip it into your choice of paint. You be using ACRYLIC paint for this. You can use black, brown, red or whatever color you want splashed for the look you are going for. You can even mix colors on a scrap piece of paper. Get your brush good and covered with your chosen color. You don't want to have a HUGE glob of paint on the brush so you can brush off the excess on the paper. Once you feel you have a good amount of paint, dip the brush BACK INTO the water. Now, while holding your brush like it's a magical wand :lol: smack it towards your armor, but DO NOT actually touch the armor. Something like this WILL need to be done either outdoors, or you CAN do it indoors, but make sure you have something down to protect other surfaces so you don't get paint on them. If you are unsure as to how this will turn out, you can experiment by splashing onto a piece of paper and once you feel comfortable with the technique, go ahead and put it on your armor. :)
BATTLE DAMAGE TIP #2: Foam can be a good advantage to create some worn, battle damaged areas. I did this on my Kat costume as well. Since I used acrylic paint to paint my costume, I noticed that if my foam got smooshed, the paint would sort of crack. I used this to my advantage and just carefully bent and squished the area I wanted a cracked effect. The paint did NOT fully come off either and I was left with a nice result! :)
BATTLE DAMAGE TIP #3: I have seen some people create scratch marks into their armor. One way I know of doing this is to use a soildering gun. It gets hot enough to melt the foam and you can create grooves and other marks into your foam. If you're not sure how to go about trying this and don't want to ruin your armor, test it on a scrap piece of foam and just play around with it and try different things to see how you feel about it. KEEP IN MIND THAT IF YOU WISH TO DO THIS, YOU MUST DO THIS BEFORE YOU PAINT!!!!!!! The soildering gun can also be used to create some of the groove lines that you may see on the armor.
WEATHERING EFFECTS: Usually, quite a few people seem to want to give their armor that "weathered" look. Depending on the look you want, there are different ways to accomplish this.
- For an all over dirty look, grab a rag or an old t-shirt (just be sure to use something that does NOT leave behind fuzzies) and get it damp. Then, using dark brown or even black acrylic paint, squeeze some onto a scrap piece of paper. Take your damp rag and dip it into the paint and keep dipping and wiping off excess onto the paper until you get a nice area of the rag covered in your paint. Then, simply start to wipe it on your armor. You can wipe it all over your armor, just in certain areas, OR while starting from the uppermost edge of the piece, press the rag onto the piece and wipe the paint downwards using a "dusting" motion. As you bring the rag down, you want to apply less pressure so that the paint fades away. You can go all down the armor or stick closer to the edge. It's ALL UP TO YOU on how you want it to look.
- If you want certain areas to have more black, (usually people do this in smaller crevices/detail parts), you can use a pintbrush and paint with the acrylic paint where you want it and if you wet the brush, this will allow you to water down the paint so you can make the paint more transparent where you want it and keep it thicker where you want it. Just be sure to add more paint to the areas you want to keep more black. You can even clean off the brush, keep it wet and brush the paint around to sort of blend it in to create the look you want.
- If you are good with an airbrush, you CAN use an airbrush to achieve a weathering effect. There is really no way to explain this unless you know how to airbrush.
GLUING TIPS: When gluing your pieces together, it is usually a good idea to place a fair amount of glue over the seam on the INSIDE of the piece. Glob it on if you have to in order to ensure that your pieces will stay together and hold strong. I really covered those areas on the inside of my Kat costume and it held up pretty good. :P
PAINTING TIPS: In MY opinion, before you start to paint your foam armor with your chosen color, it is a good idea to paint a base coat using black. If using acrylic paint, you might end up doing 2-3 coats because the foam does seem to absorb SOME of the paint. The black will help to make your color stand out more. HOWEVER, if your chosen color is a lighter color, such as pink, yellow or any other type of "lighter" shade, you may want to do a base coat of white. You can still do black if you choose, but just keep in mind that either way, you will need to paint a couple coats until your color appears the way you want it.
If doing spray paint, you might still want to do a black base coat, but since the spray paint won't create brush lines, you should be okay with going straight to your final color and probably just do 2 coats. Be sure to spray light coats so that the paint does puddle up and you ensure that you have a nice, even finish. You want to use sweeping motions when you are using a spray can and don't hold it too close either as this can increase the chances of applying too much paint to the area and the paint can then puddle and you may end up with runny paint lines going down your armor. >_<
With airbrushing, a black base coat is definitely a good option since airbrush paint is more water based and the foam may absorb it. You can either airbrush your black or even use black acrylic paint and brush it on first, THEN airbrush it your final color.
If you used plasti-dip on your armor, you pretty much already have a good base coat and can go straight to painting it your final color. :)
Now you should have a pretty general idea as to what to do, what to expect and what you will need to start a foam build. To read more about constructing your foam armor, creating foam templates and more, head over to the next page for some more helpful tips! :)
